If you’ve connected to a VPN on your Windows 8 or Windows 8.1 computer and the network connection will come up as Public by default. For most people this isn’t a major concern but you may require to change the VPN connection to Private if you have specific firewall rules which are restricting access or causing problems.
Here’s how to change a Windows VPN from Public to Private
Step 1. Open the Windows Registry Editor
Click on Start and then type in regedit
Step 2. Navigate to the following registry key
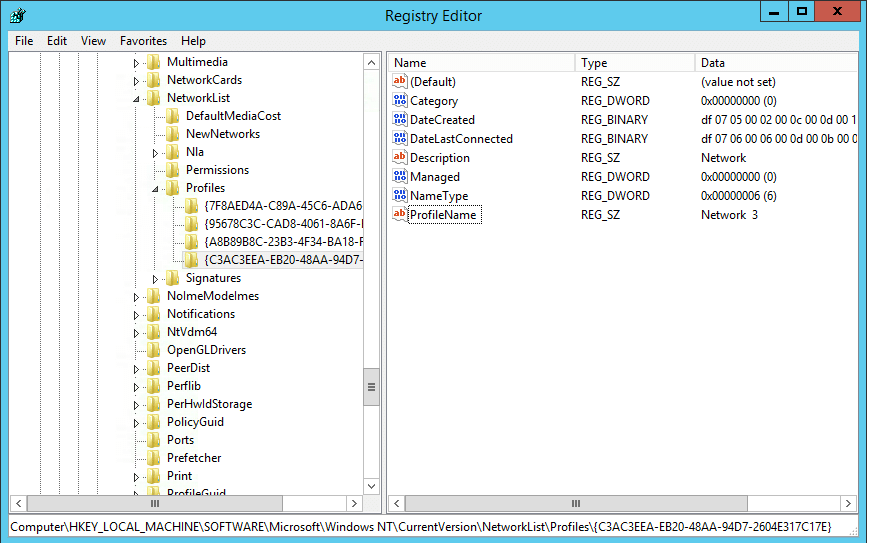
HKEY_LOCAL_MACHINE\SOFTWARE\Microsoft\Windows NT\CurrentVersion\NetworkList\Profiles
Step 3. Find the correct GUID subkey
Expand Profiles, click on each of the long GUID number subkeys whilst looking at it’s ProfileName string value in the right pane to see if it has the current network name (eg: My VPN Name) until you’ve found it. In the example below the ProfileName is Network 3.
Step 4. Find the ProfileName
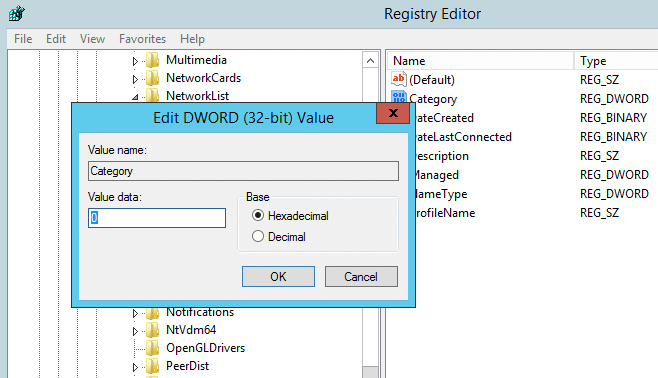
When you find the correct ProfileName for your network name, double click/tap on the Category DWORD value in the same right pane to modify it.
Step 5. Change the Network Location
Type in a new Data value number for the network location you want, and click on OK.
Here are the Network location Data values
Public 0
Private 1
Domain 2


